Time to cut out the floor pans. While accessing the stock floor sheet metal I
had decided I would need two full sides, not a complete floor pan. (Driver and passenger, front and rear of both)
Including the seat pans as they were quite rusted out on the front wall of the
pan. The transmission tunnel was still
in very good shape. So I ordered a pair
of new full length floor pans and new seat pans. I used a cutting wheel on a 4” electric
grinder to do the removal and have used this tool as a weapon on rust removal
quite a bit in this rebuild. We keep
three grinders in the rotation, one for a cutting wheel, one for a grinder, and
one for a wire brush, so much easier than switching out the devices of torture.
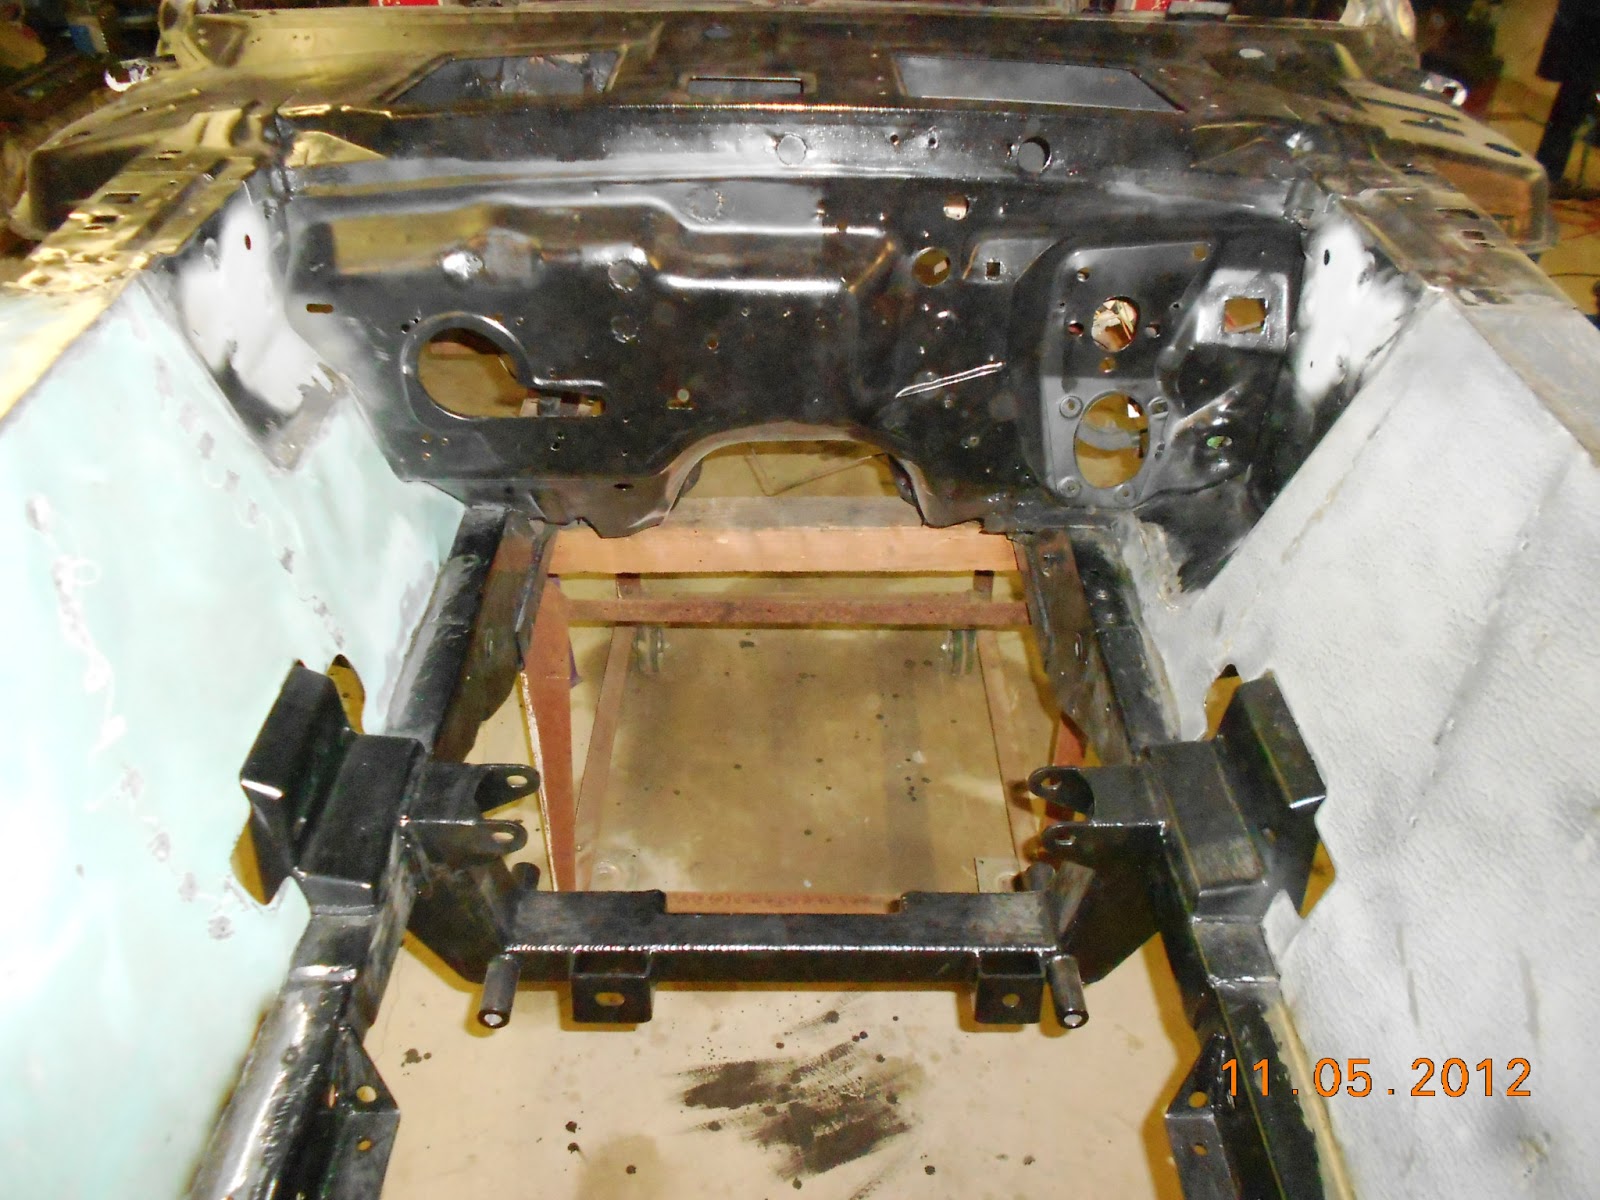
We placed the new floor pans down in the car and pushed and
shoved for best fit and to mark where to cut out for removal, giving ourselves
plenty of extra material for any mistakes and trimming later. They will need a little massaging here and
there, but overall not all that bad of a fit.
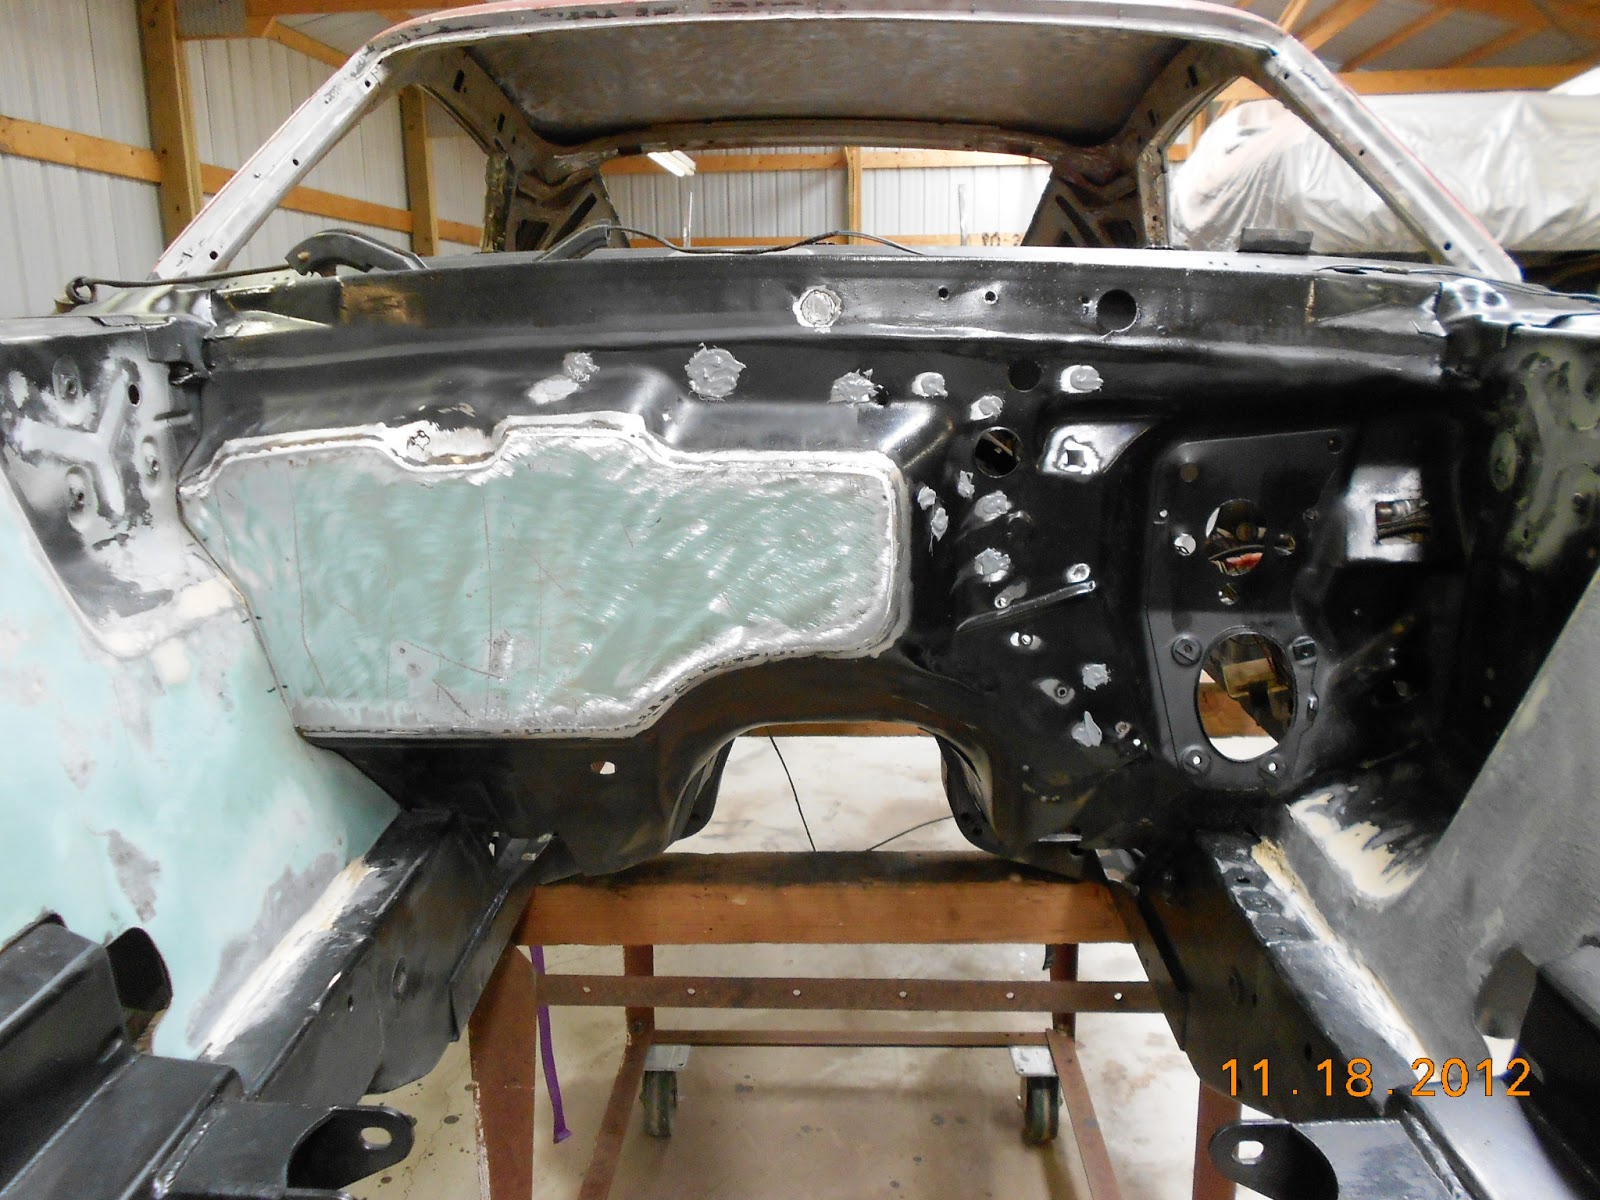
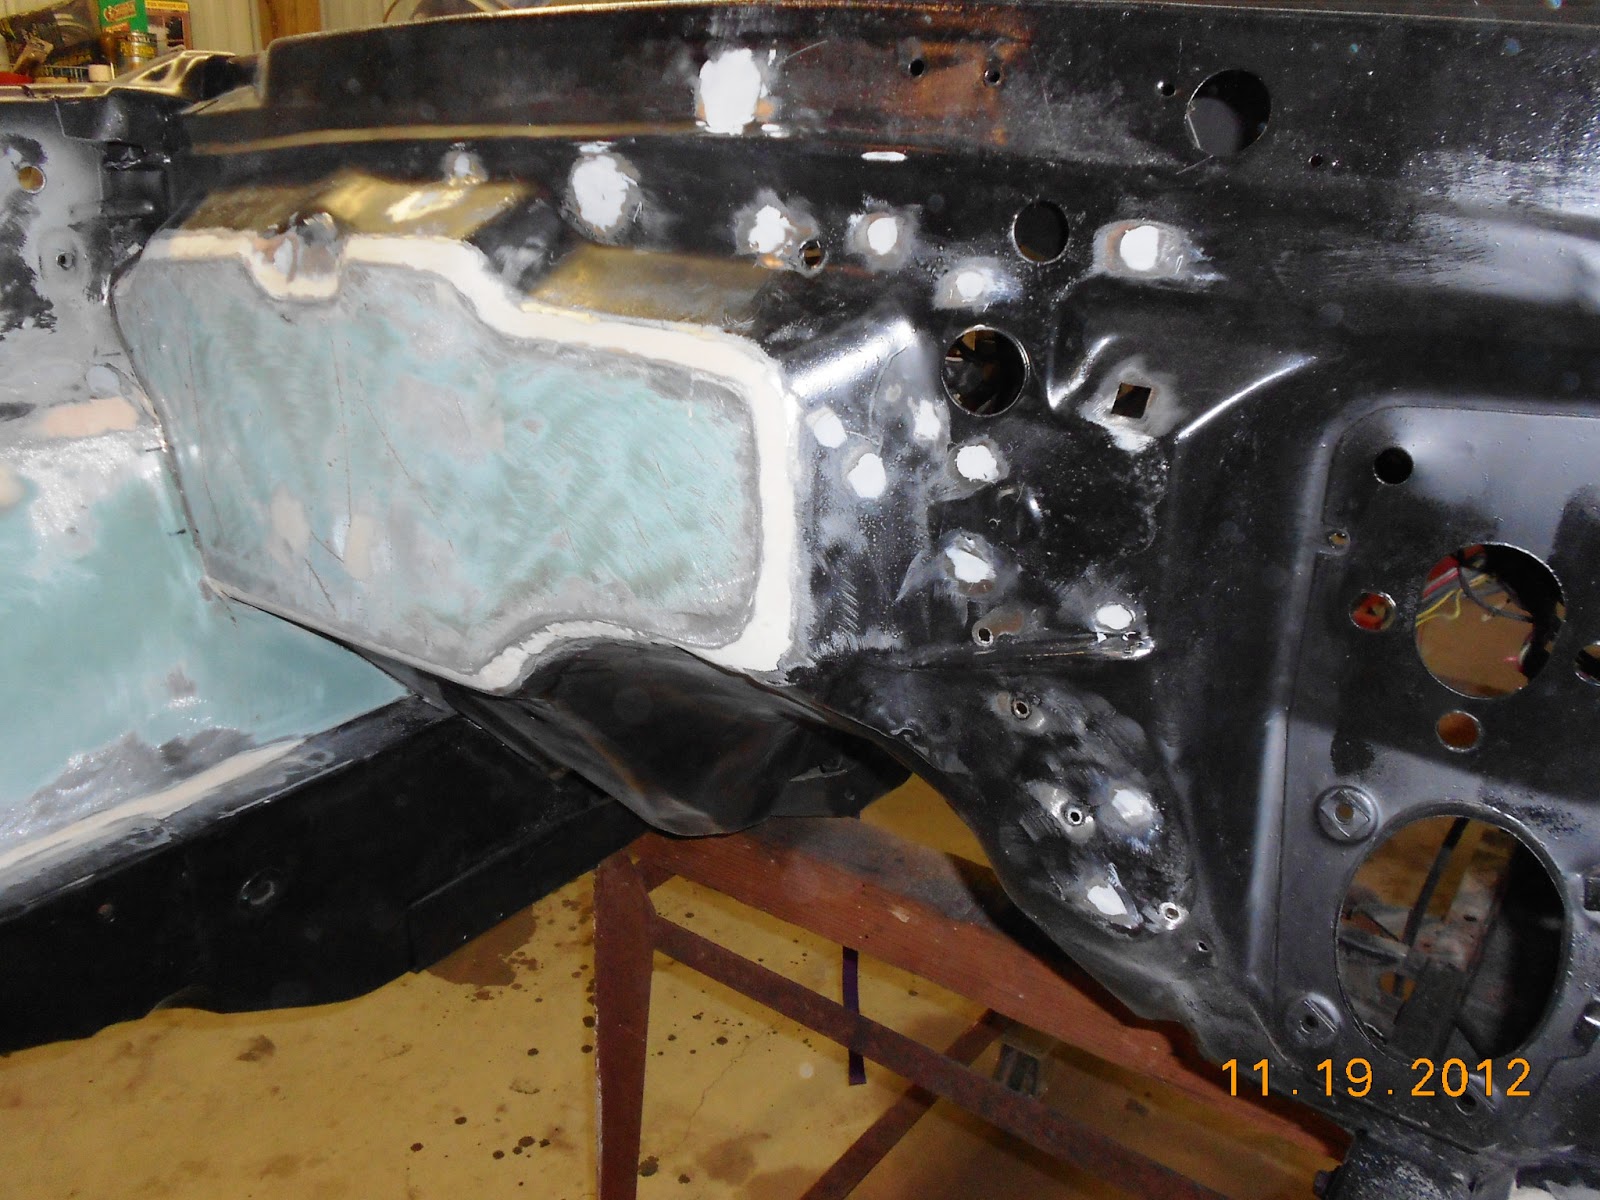
There was only one area behind the gas pedal that will require an extra
patch be placed that the new pans didn’t cover.
That is right where the cowl was leaking under the dash, straight down
onto this area. I cut the periphery with
the cutting wheel and then used a grinder to thin the metal on the spot-welds around
the frame rails and other areas. After
that I just used a chisel to knock the spot-welds loose. All the rust in the floor is gone now.
(10/24/2012) I still have not welded in the new pans, having
them out has given convenient access to other projects along the way. We’ll get to them soon as we are starting to
get closer on wrapping up some of our other fab projects on the car. Knowing that Thanksgiving and Christmas is
coming soon and the cold weather, we know our progress will be slowed somewhat
now.
(1/7/2013) We made it
to the New Year! Yeah!!! The holidays and the weather have slowed us
up some just as we knew they would but we have been steadily working on the car
when the opportunity presents itself. Continued work on smoothing the firewall,
continued work on welding in new quarters, continued work on applying POR15 to
areas, and finishing the work on welding in the floor and seat pans. Very soon it will be time to take the shell
off of the raised work cart and lower it onto jack stands, then put the rear
end back on and bolt up the new front end making it a roller so we can send it
off to Todd for final body smoothing.
In completing the floor pans we traced along the edges of the
front frame rails so we could drill holes in the pans to allow welding to the
frame rails. The rest of the pans were
welded in using stitch welding all the way around the edges, the same was done
with the seat pans. There were two areas
that the new floor pans did not cover on the driver side after cutting out the
rust. Those two areas had to have patch
panels made to fit after the pan was welded in.
After getting the rough fit on the patch panels and you begin to weld
them in, the heat from the welding allows easy forming to fit the existing
metal perfectly.
The seat pans fit very nice on top of the floor pans and the
seat bolt holes between the seat pans and floor pans all lined up very
good. The seat pans were welded into
place and all the welds were touched up with a grinder just to smooth a bit of
the roughness out. Seam sealer will be applied
inside and out to make a good watertight seam before undercoating goes on
outside and Dynamat on the inside.


A general view of the rusty floor pans. If you look close you can see the fiberglass repair someone did on the driver's side.

On it's way to becoming one of the Flintstone's cars.

Here's a better look at that fiberglass repair on driver's side.

Unlucky for me, this is where I found my build sheet, only a corner of it survived.

This is one very rusty floor. After 20 years of sitting outside in the elements with a leaky cowl you can see the results. Here you can see the driver side seat pan has already been removed. Dad got after it with his hot wrench.

A quick test fit of the pans just to satisfy the anticipation factor.

July was still pretty toasty here in Kansas. 105 degrees

Frame rail right after removal, before any cleanup. Notice the floor, all the rusty junk and pieces.

Driver's side rear before cleanup.

Passenger frame rail before cleanup.

Passenger rear.

After a bit of cleanup. You can also see the inner wheel houses have been removed in prep of minitubbing.

Passenger side after a bit of cleaning.

The scrap pile is building...and it is getting even larger now with added pieces. Shock towers, rear quarters, etc...

Cleaned and coated with POR15. Here also is a better look at the Global West subframe connectors.

After fitting, we marked the bottom around the frame rails to punch a few holes for welding to frame rails.

After fitting, we marked the bottom around the frame rails to punch a few holes for welding to frame rails.

Welds on the frame rails and the stitch welds around the periphery. You can also see areas that still require patching that the new pans did not cover.

A closer look at the frame rail welds and the area needing patched. This area is directly under the hole in the cowl, and was nothing but rust.

Stitch welding around the back of pans.

Here is the smaller patch that is right on the transmission tunnel.

Before patching.

After patching. I started the form on this piece of cold sheet meal and got it close to fitting, then started the weld. As the piece was warmed it was quite easily worked into a perfect form fitting patch.

Both patches after welding in.

Dad cleaning up a few of the welds. You can see the seat pans are already in. The seat pans went in very nicely. I was very pleased with their fitment.

Welds have been smoothed and floor is ready for another coat of POR15 and some seam sealer.

Welds have been smoothed and floor is ready for another coat of POR15 and some seam sealer.

Welds have been smoothed and floor is ready for another coat of POR15 and some seam sealer.

POR15 applied, next is the seam sealer which went on very nicely.

More POR15. That is some very tough stuff!! Careful where you apply it, you don't want to get it on anything you're gonna strip later. Even the sand blaster struggles with removal.

Overall shot with POR15 applied.

3M Brushable seam sealer. Another great product, easy to use, covers very well.

3M Brushable seam sealer. Another great product, easy to use, covers very well.

3M Brushable seam sealer. Another great product, easy to use, covers very well.

So very thankful to have this dirty, rusty part of the resto completed.